1637 lượt xem
Fix Error 0xC1900101 – Sửa lỗi Windows upgrade and installation errors .0xc1900101 – 0x30018, 0xc1900101 – 0x20017, how do i fix error 0xc1900101?, 0xc1900101 20h2, 0xc1900101 reddit, 0xc1900101 – 0x30004, 0xc1900101-0x2000c, 0xc1900101 – 0x20003 Fix Error 0xC1900101 – Nguyên Nhân Và Sửa Các Mã Lỗi Phổ Biến Trên Windows 10
Trong quá trình bạn sử dụng máy tính cũng như cài đặt hệ điều hành lại, phần mềm thì vì một nguyên nhân nào đó thì máy tính bạn sẽ hiện nên các bảng thông báo lỗi, kèm theo đó là các mã lỗi có ký tự đặc biệt. Khi nhìn các mã lỗi này thì bạn sẽ rút ra được nguyên nhân cũng như làm sao để sửa chữa lỗi đó để máy tính bạn trở lại hoạt động bình thường.
Và ở trong bài viết này mình và bạn cùng nhau tìm hiểu các thông báo lỗi phổ biến kèm theo mã lỗi đó, chúng ta sẽ xử lý lỗi đó luôn để bạn khi nào sử dụng máy tính mà gặp lỗi đó thì bạn có thể áp dụng luôn nhé.
Nội dung chính:
Mã lỗi 0xC1900101
Khi máy tính bạn gặp mã lỗi đó là 0xC1900101 thì thường nguyên nhân chủ yếu dẫn tới tình trạng này đó là liên quan đến trình điều khiển Drivers. Khi đi kèm mã lỗi này sẽ xuất hiện các mã kèm theo như sau:
[php]0xC1900101 – 0x200040xC1900101 – 0x2000c
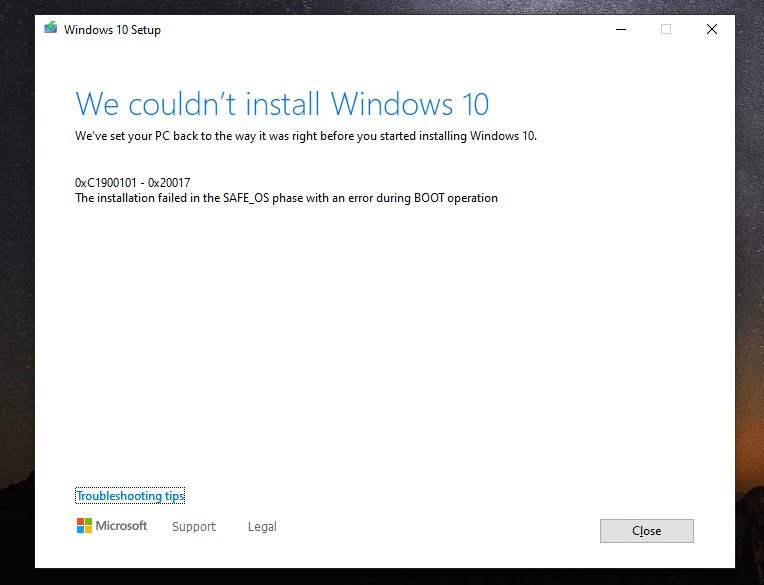
0xC1900101 – 0x20017
0xC1900101 – 0x30018
0xC1900101 – 0x3000D
0xC1900101 – 0x4000D
0xC1900101 – 0x40017[/php]
Bạn hãy áp dụng dưới đây đê khắc phục nhé. Nếu như vẫn không được thì bạn vui lòng thử cập nhật Windows 10 bạn nên phiên bản mới nhất nhé.
Cách sửa lỗi FIX Error 0xC1900101
Bước 1: Bạn hãy chắc chắn rằng ổ cứng của bạn có đủ dung lượng trống. Ổ cứng của bạn cần phải có ít nhất 16 GB dung lượng trống để nâng cấp HĐH Windows 32 bit hoặc 20 GB cho HĐH Windows 64 bit.
Bước 2: Chạy Windows Update một vài lần. Tải xuống và cài đặt bất kỳ bản cập nhật nào khả dụng trong Windows Update, bao gồm bản cập nhật phần mềm, bản cập nhật phần cứng và một số trình điều khiển bên thứ ba. Sử dụng bộ hướng dẫn giải quyết trục trặc cho Windows 10 để khắc phục lỗi Windows Update.
Bước 3: Kiểm tra trình điều khiển bên thứ ba và tải xuống bản cập nhật bất kỳ. Bạn có thể tìm thấy các trình điều khiển bên thứ ba và hướng dẫn cài đặt cho bất kỳ phần cứng nào mà bạn đã thêm vào thiết bị của mình trên trang web của nhà sản xuất.
Bước 4: Tháo phần cứng phụ. Tháo tất cả các thiết bị lưu trữ và ổ đĩa bên ngoài, đế cắm cũng như phần cứng khác mà bạn có thể đã cắm vào thiết bị nhưng không cần thiết cho chức năng cơ bản.
Bước 5: Kiểm tra Trình quản lý Thiết bị để tìm lỗi Chọn nút Khởi động , sau đó trong hộp tìm kiếm trên thanh tác vụ, nhập trình quản lý thiết bị. Chọn Trình quản lý Thiết bị từ các kết quả. Trong cửa sổ bật lên, tìm bất kỳ thiết bị nào có dấu chấm than màu vàng bên cạnh (bạn có thể phải chọn từng danh mục để chuyển sang danh sách các thiết bị). Nhấn và giữ (hoặc bấm chuột phải vào) tên thiết bị và chọn Cập nhật Phần mềm Trình điều khiển hoặc Gỡ cài đặt để hiệu chỉnh lỗi.
Bước 6: Loại bỏ phần mềm bảo mật bên thứ ba. Hãy đảm bảo bạn biết cách cài đặt lại các chương trình của mình và có sẵn mọi khóa sản phẩm cần thiết. Bộ bảo vệ Windows sẽ giúp bảo vệ thiết bị của bạn trong thời gian chờ đợi.
Bước 7: Sửa lỗi ổ cứng Chọn nút Bắt đầu , sau đó trong hộp tìm kiếm trên thanh tác vụ, nhập dấu nhắc lệnh. Chọn Dấu nhắc Lệnh từ danh sách kết quả. Trong cửa sổ bật lên, nhập chkdsk/f C: rồi nhấn phím Enter. Quá trình sửa lỗi sẽ tự động bắt đầu trên ổ cứng và bạn sẽ được yêu cầu khởi động lại thiết bị.
Bước 8: Tiến hành khôi phục và sửa chữa các tệp hệ thống. Chọn nút Bắt đầu , sau đó trong hộp tìm kiếm trên thanh tác vụ, nhập dấu nhắc lệnh. Chọn Dấu nhắc Lệnh từ danh sách kết quả. Trong cửa sổ bật lên, nhập DISM.exe /Online /Cleanup-image /Restorehealth rồi nhấn phím Enter. (Tìm hiểu cách sửa chữa ảnh Windows)
Bạn hãy thử lần lượt các bước trên nhé.
Ngoài mã lỗi này thì mình cũng liệt kê các lỗi khác phổ biến dưới đây để bạn gặp có thể xử lý luôn nhé.
Sửa lỗi 0x80073712
Tệp mà Windows Update cần đến có thể bị hỏng hoặc thiếu.
Sửa lỗi 0x800F0923
Mã này cho thấy rằng trình điều khiển hoặc phần mềm khác trên PC của bạn không tương thích với bản nâng cấp lên Windows 10.
Sửa lỗi 0x80200056
Mã này có nghĩa là quá trình nâng cấp bị gián đoạn vì bạn vô tình khởi động lại PC hoặc đăng xuất khỏi PC. Hãy thử nâng cấp lại và bảo đảm bạn đã cắm PC với nguồn và luôn bật PC.
Sửa lỗi 0x800F0922
Lỗi này có nghĩa là PC không thể kết nối với máy chủ Windows Update. Nếu bạn đang sử dụng kết nối VPN để kết nối với mạng cơ quan, hãy ngắt kết nối khỏi mạng đó và tắt phần mềm VPN (nếu có) rồi thử nâng cấp lại.
Lỗi này cũng có nghĩa là không đủ dung lượng trống trong phân vùng Dành riêng cho Hệ thống. Bạn có thể khắc phục sự cố này bằng cách sử dụng phần mềm của bên thứ ba để tăng dung lượng của phân vùng System Reserved.
Sửa lỗi: Chúng tôi không thể hoàn tất cập nhật. Đang hủy các thay đổi. Đừng tắt máy tính của bạn và Lỗi: Cấu hình Windows Updates không thành công. Đang khôi phục các thay đổi.
Đây là các lỗi chung có thể xuất hiện bất cứ lúc nào khi bản cập nhật của Windows không hoạt động. Bạn cần xác định mã lỗi cụ thể để tìm ra cách tốt để xử lý sự cố này. Bạn có thể tìm mã lỗi cho bản cập nhật không thành công bằng cách xem lịch sử cập nhật.
Để xem lịch sử cập nhật của bạn trong Windows 8.1: Mở Windows Update bằng cách trượt nhanh từ cạnh bên phải của màn hình (hoặc nếu bạn đang dùng chuột, hãy trỏ tới góc dưới bên phải của màn hình và di chuyển con trỏ chuột lên), chọn Cài đặt > Thay đổi cài đặt PC > Cập nhật và khôi phục > Xem lịch sử cập nhật của bạn.
Cách xem lịch sử cập nhật của bạn trong Windows 7: Chọn nút Bắt đầu Start button icon. Trong hộp tìm kiếm, nhập Cập nhật và sau đó trong danh sách kết quả, Chọn Windows Update > Xem lịch sử cập nhật.
Lỗi: Bản cập nhật này không áp dụng cho máy tính của bạn.
Lỗi này có nghĩa là PC của bạn chưa cài đặt bản cập nhật bắt buộc. Hãy kiểm tra để đảm bảo tất cả các bản cập nhật quan trọng đều đã được cài đặt trên PC của bạn trước khi nâng cấp.
Sửa lỗi 0xC1900208 – 0x4000C
Mã này có thể cho thấy rằng ứng dụng không tương thích được cài đặt trên PC của bạn đang chặn quá trình nâng cấp hoàn tất. Hãy kiểm tra để đảm bảo rằng mọi ứng dụng không tương thích được gỡ cài đặt rồi thử nâng cấp lại.
Sửa lỗi 0xC1900200 – 0x20008 0xC1900202 – 0x20008
Mã này có thể cho biết rằng PC của bạn không đáp ứng các yêu cầu tối thiểu để tải xuống hoặc cài đặt bản nâng cấp lên Windows 10.
Sửa lỗi 0x80070070 – 0x50011 0x80070070 – 0x50012 0x80070070 – 0x60000
Mã này có thể cho biết rằng PC của bạn không có đủ dung lượng để cài đặt bản nâng cấp. Hãy giải phóng một ít dung lượng trên ổ đĩa và thử lại.
Reasons for 0xc1900101 Error
When you update or install your operating system, the system sometimes prompts you with a 0xc1900101 error with BSOD. There are many reasons for this error code and I’ll just list some of them.
- Corrupted system files in Windows.
- False system files in Windows caused by an incomplete uninstallation, an incomplete installation, improper deletion of hardware or applications.
- Out-date drivers or operating system is not compatible with the drivers.
- Antivirus software or virus attack.
- Incompatible external hardware.
I have figured out that problem was that my BIOS was out-of-date and was causing the problems. I just had to update by BIOS to the latest version, and the Windows Media Creation Tool worked!
I thought I would post the solution in case anyone had a similar problem.
Error Code Related to 0xc1900101
Errors starting with 0xc1900101 are usually driver-related errors, so if you see the following errors, you can take the same approaches to resolve them.
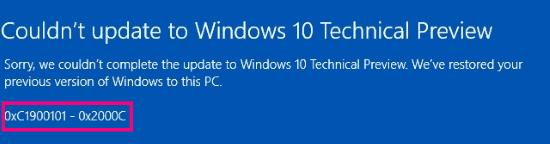
- 0xC1900101 – 0x2000c
- 0xC1900101 – 0x20017
- 0xC1900101 – 0x30018
- 0xC1900101 – 0x3000D
- 0xC1900101 – 0x4000D
- 0xC1900101 – 0x40017
How to Fix 0xc1900101 Error?
So after you have known what reasons can cause 0xc1900101 error, then read the following paragraphs to find a way to solve it. And some of the following methods need administration permissions on your device.
Before you begin to fix 0xc1900101 error, you’d better enter safe mode in advance in case that other errors occur while solving this problem.
Way 1: Remove All External Devices
If there are a lot of external devices plugged into your computer, such as DVD, printer, USB flash drive or digital camera, then Windows will get stuck when trying to figure out the drivers for them. And sometimes the drivers of external devices may not be compatible with the operating system.
Therefore, in order to solve the problem that shows error code 0xc1900101 Windows 10, you’d better remove all the unwanted external devices. Then restart your computer to check whether this error happens again.
If this method doesn’t fix this error, then you can try the following ones.
Way 2: Free up Disk Space
Do you know how much space does Windows 10 take? Actually, nowadays you need to have a minimum of 32 GB of free space to update to Windows 10 version 1903 whether it is a 32-bit or 64-bit.
So if you don’t meet the minimum requirement, then error code 0xc1900101 may occur. Then you can solve this error by releasing hard drive space to successfully install the update.
There are many different methods to get more storage space for your system partition. Now I will list some of the efficient methods for you to gain more storage space on your hard drive.
- Extend your system partition.
- Delete temporary files and Windows.old folder.
- Turn off Hibernation.
- Uninstall useless applications.
- Change the Virtual Memory size in Windows 10.
- Migrate your operating system to a larger SSD or HDD.
If you want to get detailed information, then click here. And if you have got enough free space, but 0xc1900101 error still occurs again, then you need to try the following ways.
Way 3: Run the Windows Update Troubleshooter
If there is something wrong with your hardware, then 0xc1900101 error will occur, too. Therefore, you can try running Windows Update Troubleshooter to check if there is a problem with your hardware.
Here are the instructions for running Windows Update Troubleshooter.
Step 1: Click Settings from the Start menu to continue.
Step 2: Click Update & security on the Settings page to continue.
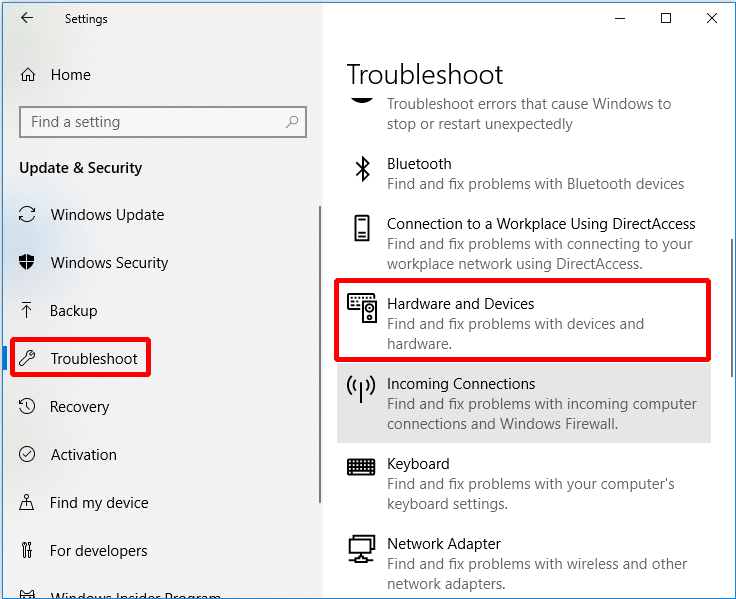
Step 3: Click Troubleshoot and click Hardware and Devices in the right panel to continue.
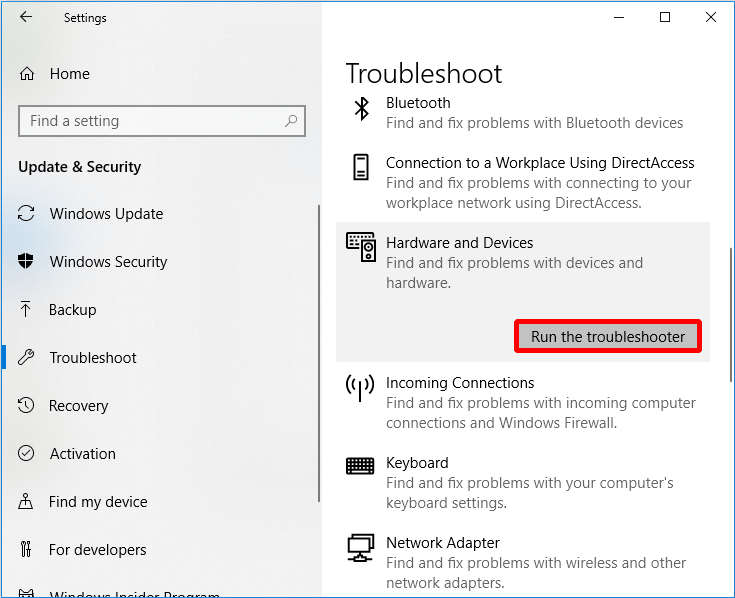
Step 4: Click Run the troubleshooter to continue.
Then just wait for the computer to detect the problems. And if there are problems with hardware, they will be displayed after the scanning process is completed. Then you just need to select the problems to fix.
However, if there is no problem detected, then it may not be a hardware problem, and you may need to try the following methods.
Way 4: Update or Uninstall Drivers
Sometimes, if you only upgrade your operating system while not update drivers, then 0xc1900101 error will occur. And this is because your upgraded operating system is not compatible with the out-of-date drivers. Similarly, if your drivers are damaged, this error will occur, too.
Therefore, I highly recommend you to update your drivers or even uninstall them to fix 0xc1900101 error. Then how to do it? Here’s the way to update your driver or uninstall the device.
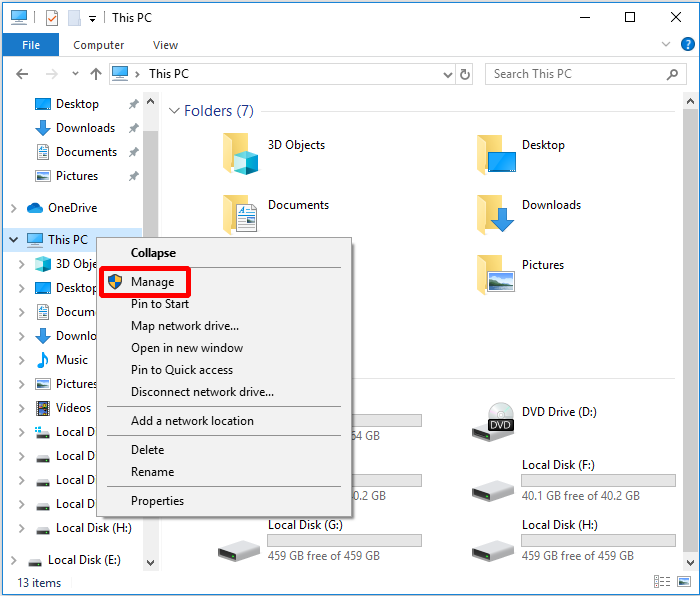
Step 1: Open File Explorer and right-click This PC to continue.
Step 2: Choose Manage to continue.
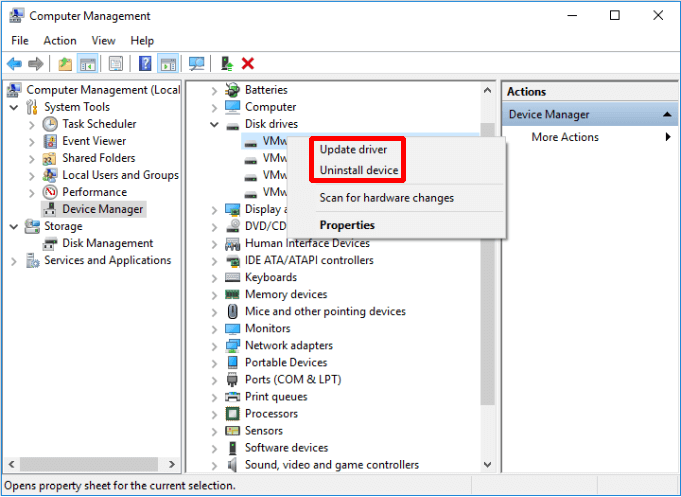
Step 3: Choose Device Manager under System Tools option to continue.
Step 4: Right-click the disk device under Disk Drives, then choose Update driver or Uninstall device.
You’d better update all the disk drivers. And after updating all the disk drivers, you need to reboot your computer to see whether this error occurs again. If this way doesn’t resolve it, then try the next one.
Way 5: Check Disk
As we all know, the corrupted file system or bad sectors on the disk will cause many errors to happen, and 0xc1900101 error is one of them. So in order to fix 0xc1900101 error, using the Windows Snap-in tool – Check Disk is a good idea.
Check Disk can scan the file system and fix any logical corrupted file system. Besides, it will repair soft bad sectors and mark hard bad sectors to avoid being used again.
Here is the way to check the file system or whether there are bad sectors.
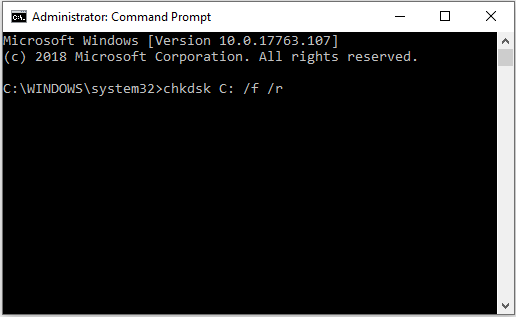
Step 1: Enter cmd in the search box next Cortana, then right-click Command Prompt to click Run as administrator to continue.
Step 2: Press Enter after typing chkdsk C: /f /r. (C is the letter of the drive where you save your operating system.)
If you restart your computer, and find that 0xc1900101 error occurs again, then it may be not the reasons for the corrupted file system or bad sectors on the disk. So you need to try the following method.
Way 6: Uninstall Non-Microsoft Antivirus Software
If 0xc1900101 error occurs, then the problem might be your non-Microsoft anti-virus software on your computer. So in order to fix this problem, you need to uninstall it completely at first and try to reinstall your operating system.
Besides, sometimes all files and registry entries with your non-Microsoft antivirus software need to be moved. And the best way to do that is to download and use a specified removal tool for antivirus.
However, if uninstalling anti-virus software doesn’t fix the error, then you can try the following method.
Way 7: Upgrade BIOS
There is another way to fix the 0xc1900101 error, which is to upgrade BIOS. If your BIOS is out of date, then you cannot upgrade your operating system successful.
So in order to get rid of this error, you need to update your BIOS. But it is very complicated to do that and you may cause damage to your computer once you have done wrong, so you’d better check your motherboard manual to upgrade your BIOS.
And if this way still cannot fix the error, then you need to try the last method.
Way 8: Reset This PC
After you tried all the above methods, but you haven’t fix 0xc1900101 error, then you’d better reset your computer. You can save your personal files by Reset this PC feature built-in Windows 10. And this way is really convenient for you.
Here is the tutorial.
Step 1: Click Update & Security on the Settings page.
Step 2: Click Recovery and click Get Started on the right.
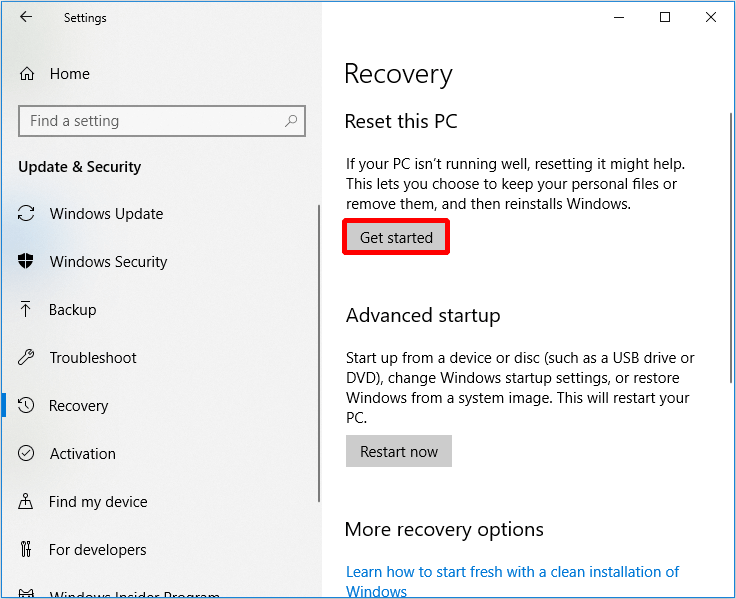
Step 3: Choose whether to Keep my files or Remove everything to reset your PC.
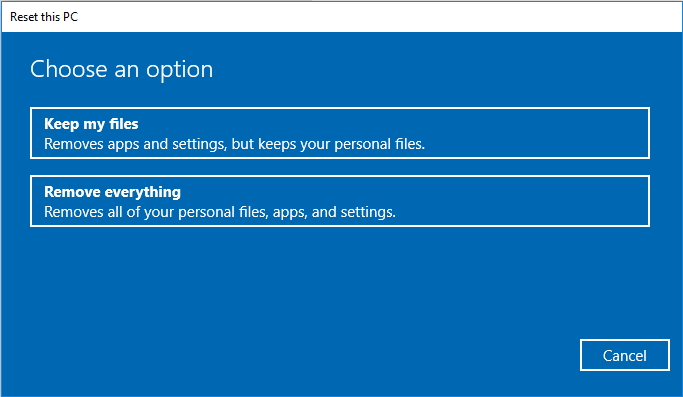
Step 4: Read the following messages and click Reset.
You need to wait for a period of time when the computer is resetting. And you can also try to reinstall your operating system to fix this error.
From this article, I have known why 0xc1900101 occurs and I also have mastered several efficient solutions to fix 0xc1900101 error.Click to tweet
Useful Suggestion
There are always various errors that occur during using your computer, so in order to ensure that the system can be restored in time when the system crashes, I suggest you back up your system in time.
So how to back up the operating system safely and quickly? I extremely recommend you to use MiniTool ShadowMaker – a piece of professional backup and restore software. You can use it to back up files and folders, operating system, disks and partitions.
What’s more, you can use it to sync files to two or more locations easily. And you can use the Disk Clone feature under Tools page to make an external drive bootable, and you can even clone simple volume on dynamic disk using this feature.
One better thing is that you can use the software for free within 30 days, so it is a good idea to download MiniTool ShadowMaker and have a try.
Free Download
Here is the way to use MiniTool ShadowMaker to back up the operating system.
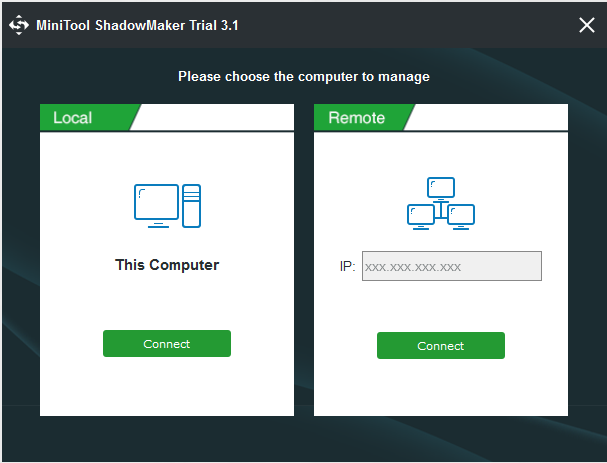
Step 1: Launch MiniTool ShadowMaker and choose Local or Remote to get the main interface by clicking Connect.
Step 2: Go to the Backup page. MiniTool ShadowMaker backs up the operating system and selects Destination by default. But you can click Source and Destination to change the source and destination.
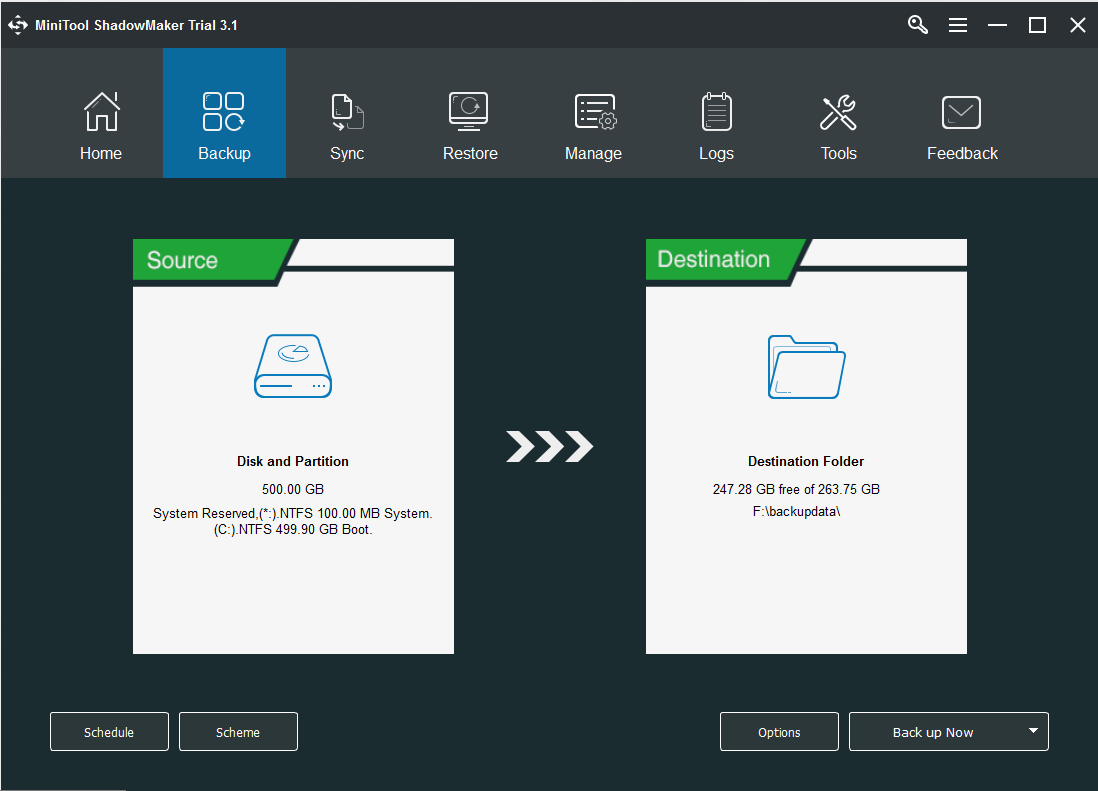
There are three important features under the Backup page which is very useful for you.
- Schedule: In order to avoid losing data, you can set automatic backup here.
- Scheme: Manage the space occupied by the backed up files by deleting the specified backup image file versions here.
- Options: Set some advanced parameters here, such as adding comments to backup data, setting encryption mode, shutting down after successful backup, etc.
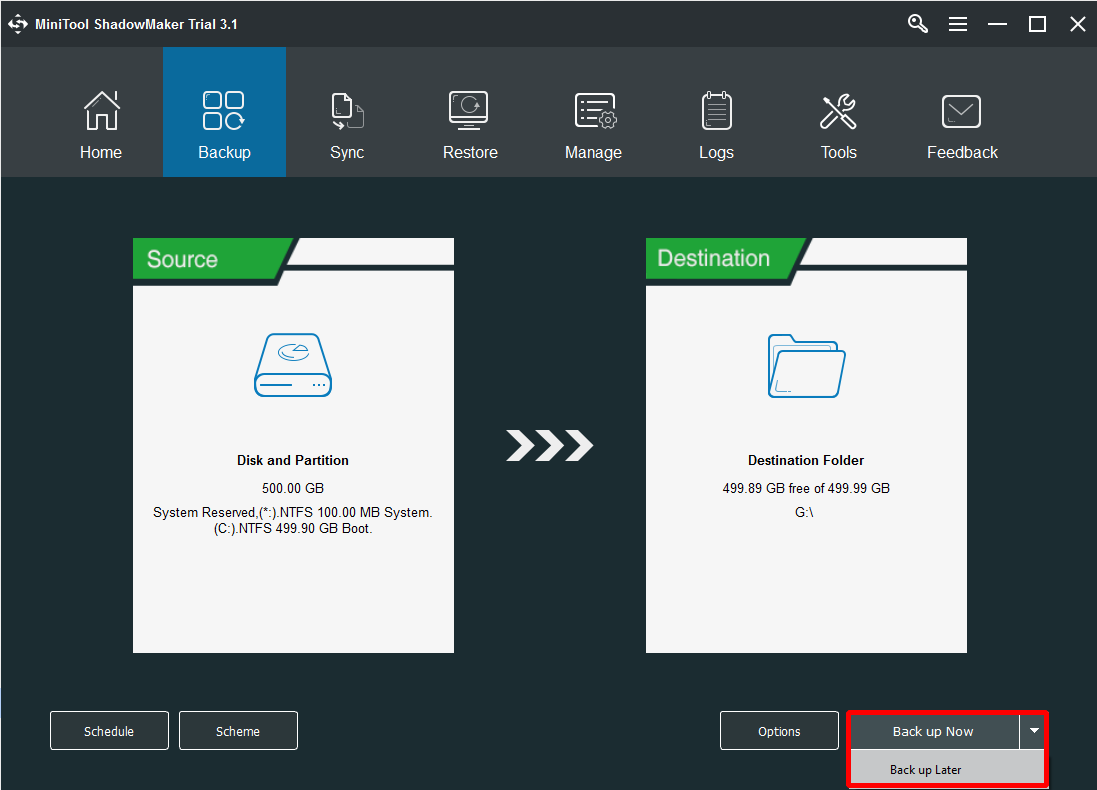
Step 3: Click Back up Now when you have confirmed the backup source and backup destination.
After finishing these steps, you can back up the operating system successfully.
I suggest that you use MiniTool ShadowMaker to create bootable media in case that you cannot boot your computer.
Bottom Line
In conclusion, there are many reasons to cause the 0xc1900101 error. But at the same time, I have offered you 8 powerful methods to fix this error from this article. In addition, I have offered you a piece of efficient backup software in case that losing data.
If you have any better advice or have confusion about the methods, leave a comment below or send an email to support@minitool.com.
0xc1900101 FAQ
There are 8 methods you can try to fix the error:
- Remove all external devices.
- Free up disk space.
- Run the Windows Update Troubleshooter.
- Make changes to Drivers.
- Check Disk.
- Uninstall third-party antivirus software.
- Upgrade BIOS.
- Reset this PC.