2062 lượt xem
Sửa lỗi không in được mã lỗi Operation failed with error 0x0000011b khi in qua mạng .Ngày 15/9/2021 vừa qua Microsoft tung bản vá Cumulative Update for Windows Để fix lỗi bảo mật PrintNightmare. Tuy nhiên sau khi cập nhật máy chủ thì các máy khách không thể in qua mạng được nữa
Nội dung chính:
Cách 1: Sửa lỗi error 0x0000011b không in được qua mạng bằng cách gỡ bản cập nhật.
Các bản cập nhật của Microsoft luôn làm chúng ta đau đầu. Hệ thống đang chạy ổn định thì cập nhật 1 cái làm bao việc bị đình trệ. Nhiều công ty yêu cầu IT tắt cập nhật cho server để đảm bảo việc hoạt động liên tục. Cách này tiện nhưng cũng gây ra nhiều rủi ro vì các lỗ hổng bảo mật không được fix kịp thời. Nếu bạn chấp nhận việc này thì hãy gỡ bản cập nhật tháng 9/2021 ra khỏi hệ thống.
Thông tin lỗi: https://msrc.microsoft.com/update-guide/vulnerability/CVE-2021-34527
Cách làm:
Đầu tiên vào run gõ Control.cpl và Enter tiếp đó tìm => Programs and Features
Click View Installed updates Ở bên trái
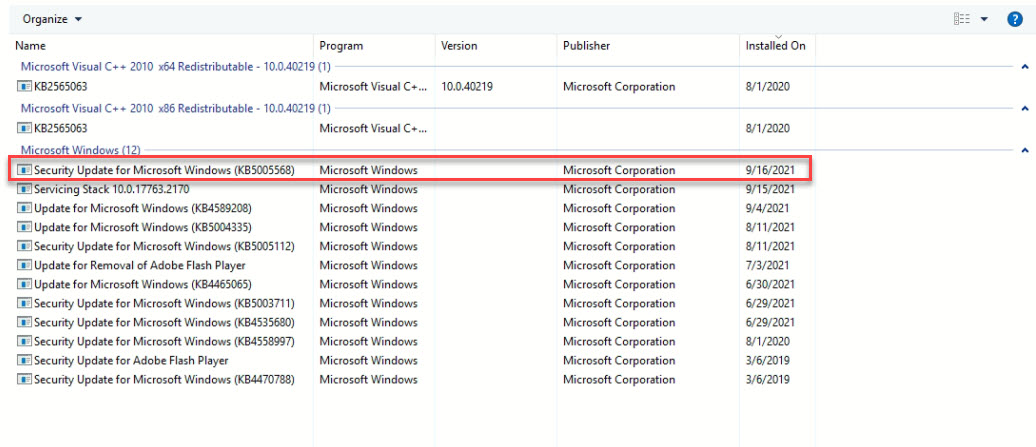
Gỡ Bản update cài 15/9 hoặc 16/9 (KB5005563 hay KB5005568 tuỳ bản windows 10 bạn đang dùng)
Khởi động lại máy! và bạn đã có thể in được.
Dưới đây là video hướng dẫn:
Nếu lỗi quay trở lại sau vài ngày thì có thể bạn cần tắt windows update.
Vào run gõ GPEDIT.MSC, enter
Tìm mục Administrative Template => Windows Components => Windows Update => Configure Automatic Updates
Chọn mục thành Disabled
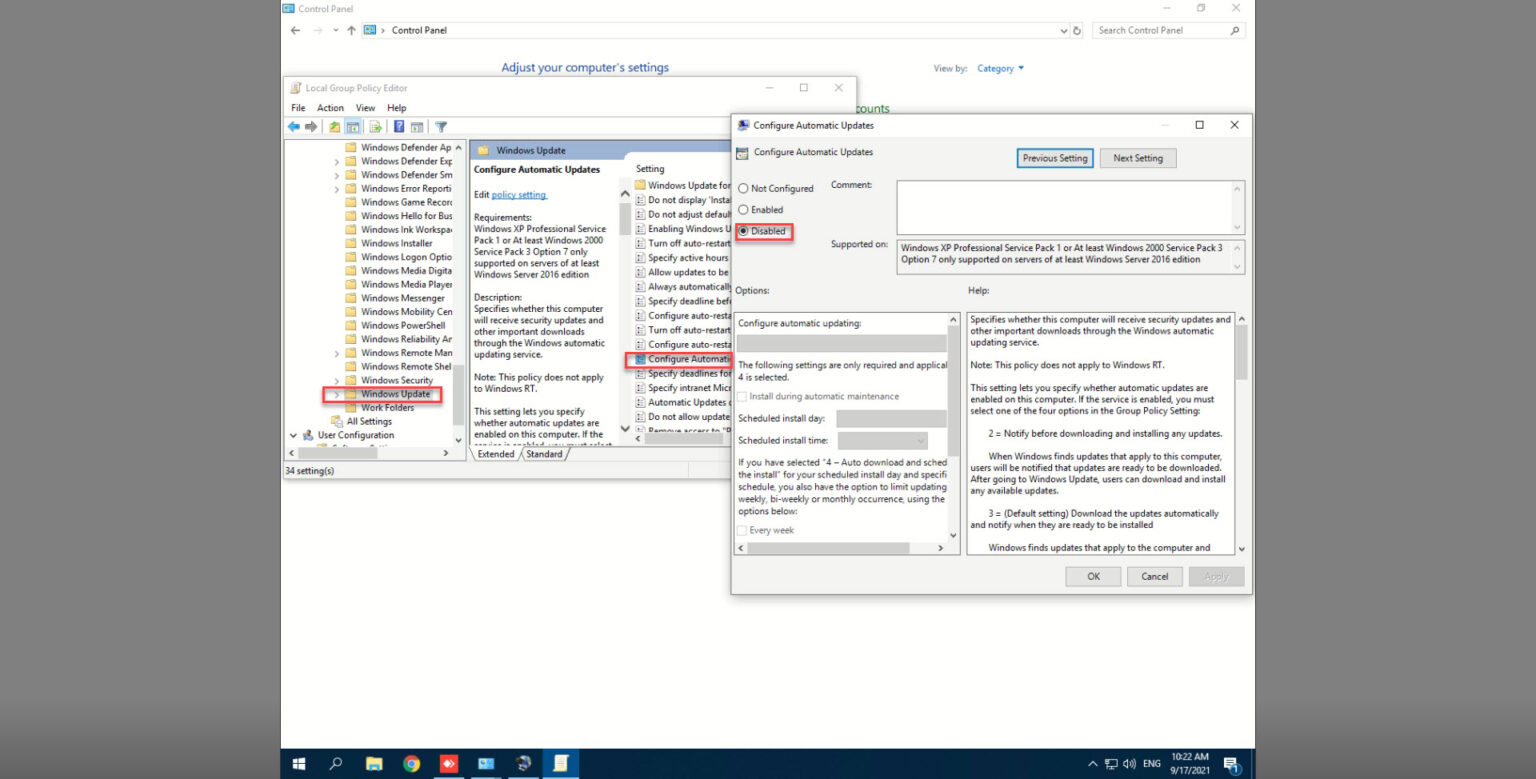
Sau khi thực hiện bạn khởi động lại máy là được!
Cách 2: Thao tác trên client để add máy in qua mạng.
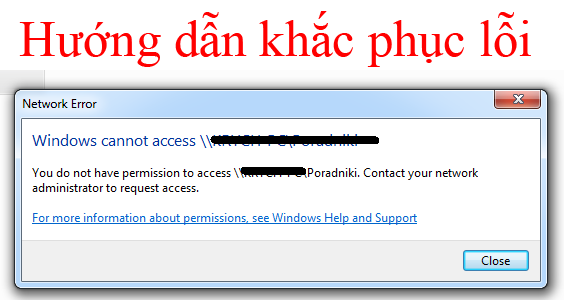
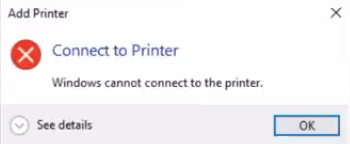
Nếu máy chủ cài bản vá lỗi tháng 9 thì khi add máy in qua mạng sẽ báo lỗi: Operation failed with error 0x0000011b, Nếu máy in đã add trước đó sẽ báo lỗi không in được.
Sau khi thử nhiều cách được hướng dẫn trên mạng mình đã tìm được cách sau:
Vào control Panel, mở Credntial Manager
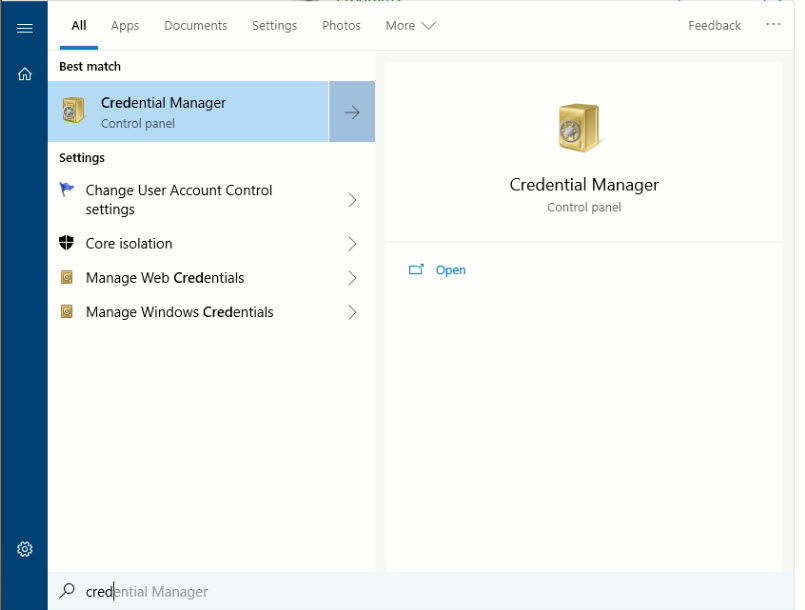
Chọn Mục Windows Credntials
Click vào Add a Windows credential
Nhập địa chỉ IP hoặc server name vào mục Internet or network address
Username: guest
Password:
Bấm Ok save lại và thoát khỏi Credential Manager
Đến đây bạn có thể add printer bình thường (Có thể phải gỡ máy in cũ ra rồi add lại)
Update 24/9/2021.
Hôm nay một số bạn có email cho mình fix theo cách 1 ok nhưng vài hôm lại bị update lại bản vá. Cách 2 thì máy được máy không. Sau 1 hồi tìm hiểu mình gửi thêm 1 cách nữa để các bạn thực hiện. Cách này áp dụng trên máy chủ cài máy in và không cần gỡ bản cập nhật nào cả.
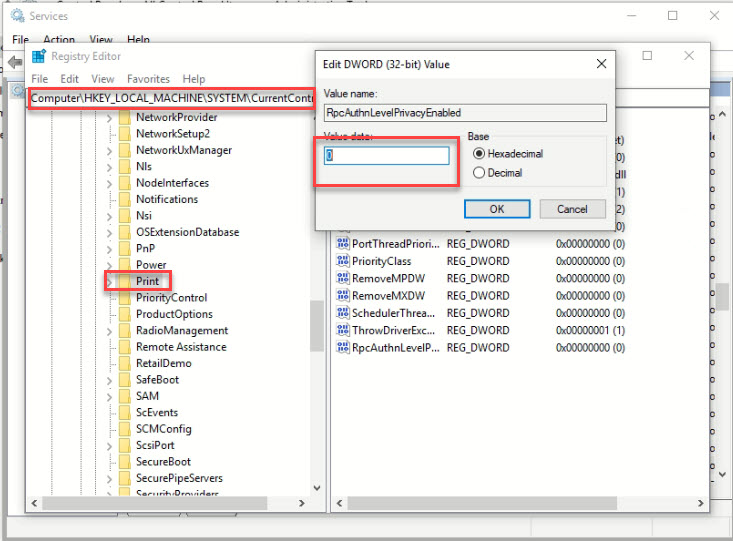
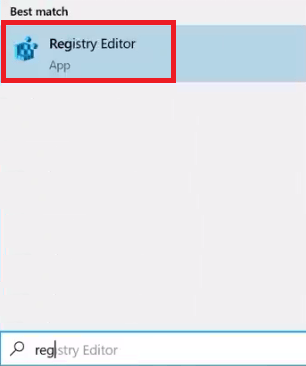
B1: Mở regedit.exe
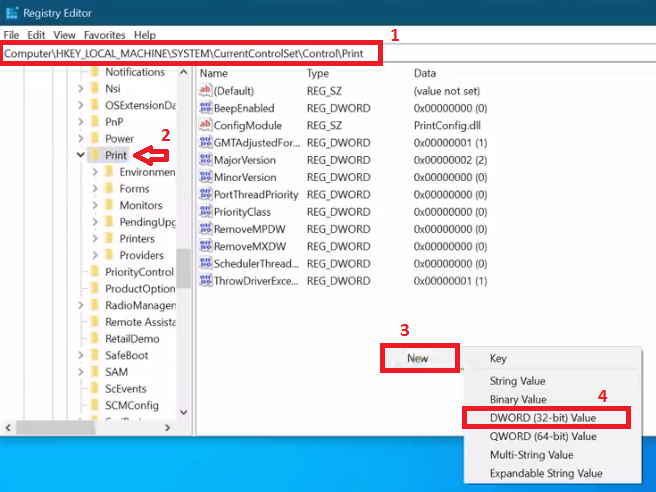
- Tìm đến khoá “HKEY_LOCAL_MACHINE\System\CurrentControlSet\Control\Print”
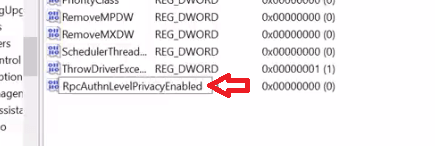
- Tạo thêm 1 DWORD với tên: RpcAuthnLevelPrivacyEnabled đặt g ía trị là 0
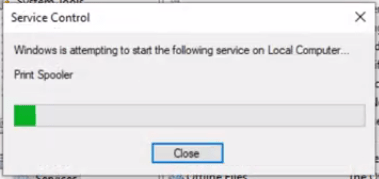
B2: Restart lại Print Spooler service.
Lúc này b ạn có thể thêm máy in từ client và in bình thường!
Hình ảnh:
Chúc các bạn thành công
Các bạn có tạo file batch để làm toàn bộ các công việc trên với nội dung sau:
1 2 3 4 5 6 7 8 9 10 11 12 13 14 15 | @echo off cls echo. echo “Fixing registry value…” echo. REG ADD HKEY_LOCAL_MACHINE\System\CurrentControlSet\Control\Print\ /f /v RpcAuthnLevelPrivacyEnabled /t REG_DWORD /d echo. echo “Restarting Print Spooler Service” pause echo. net stop spooler net start spooler pause |
Lưu file dưới tên fix.cmd rồi chạy với quyền Adminsitrator nhé!
Executive Summary
A remote code execution vulnerability exists when the Windows Print Spooler service improperly performs privileged file operations. An attacker who successfully exploited this vulnerability could run arbitrary code with SYSTEM privileges. An attacker could then install programs; view, change, or delete data; or create new accounts with full user rights.
UPDATE July 7, 2021: The security update for Windows Server 2012, Windows Server 2016 and Windows 10, Version 1607 have been released. Please see the Security Updates table for the applicable update for your system. We recommend that you install these updates immediately. If you are unable to install these updates, see the FAQ and Workaround sections in this CVE for information on how to help protect your system from this vulnerability.
In addition to installing the updates, in order to secure your system, you must confirm that the following registry settings are set to 0 (zero) or are not defined (Note: These registry keys do not exist by default, and therefore are already at the secure setting.), also that your Group Policy setting are correct (see FAQ):
- HKEY_LOCAL_MACHINE\SOFTWARE\Policies\Microsoft\Windows NT\Printers\PointAndPrint
- NoWarningNoElevationOnInstall = 0 (DWORD) or not defined (default setting)
- UpdatePromptSettings = 0 (DWORD) or not defined (default setting)
Having NoWarningNoElevationOnInstall set to 1 makes your system vulnerable by design.
UPDATE July 6, 2021: Microsoft has completed the investigation and has released security updates to address this vulnerability. Please see the Security Updates table for the applicable update for your system. We recommend that you install these updates immediately. If you are unable to install these updates, see the FAQ and Workaround sections in this CVE for information on how to help protect your system from this vulnerability. See also KB5005010: Restricting installation of new printer drivers after applying the July 6, 2021 updates.
Note that the security updates released on and after July 6, 2021 contain protections for CVE-2021-1675 and the additional remote code execution exploit in the Windows Print Spooler service known as “PrintNightmare”, documented in CVE-2021-34527.
Workarounds
Determine if the Print Spooler service is running
Run the following in Windows PowerShell:
Get-Service -Name Spooler
If the Print Spooler is running or if the service is not set to disabled, select one of the following options to either disable the Print Spooler service, or to Disable inbound remote printing through Group Policy:
Option 1 – Disable the Print Spooler service
If disabling the Print Spooler service is appropriate for your enterprise, use the following PowerShell commands:
Stop-Service -Name Spooler -Force
Set-Service -Name Spooler -StartupType Disabled
Impact of workaround Disabling the Print Spooler service disables the ability to print both locally and remotely.
Option 2 – Disable inbound remote printing through Group Policy
You can also configure the settings via Group Policy as follows:
Computer Configuration / Administrative Templates / Printers
Disable the “Allow Print Spooler to accept client connections:” policy to block remote attacks.
You must restart the Print Spooler service for the group policy to take effect.
Impact of workaround This policy will block the remote attack vector by preventing inbound remote printing operations. The system will no longer function as a print server, but local printing to a directly attached device will still be possible.
How to Fix “Windows cannot connect to the printer – Operation failed with error 0x0000011B”
In order to fix the ‘Windows cannot connect to the printer. Error: Operation failed with error 0x0000011B in network’ error you need to follow some steps both at the client computer (where you want to access the printer) and the host computer (where the printer is installed). Follow the steps given below in the correct order to resolve this problem.
1) Steps for the Client Computer
Before applying the solution you must check for the error. Follow the steps given below:
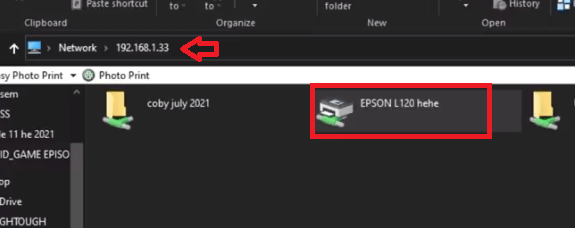
- Open the Network page and double click on the printer link to connect with the printer.

- In case you see the error message show below, then follow the steps given in the following sections to solve this error.

2) Steps for the Host Computer
All these steps need to be performed in the computer where the printer is installed.
- Type ‘registry’ in the taskbar search box and click on ‘Registry Editor’ in the search results.

- In the Registry Editor window, navigate to ‘Computer\HKEY_LOCAL_MACHINE\SYSTEM\CurrentControlSet\Control\Print’, then right click in the blank space and choose ‘DWORD (32-bit) Value’ option under the ‘New’ sub-menu.

- Rename the DWORD value to ‘RpcAuthnLevelPrivacyEnabled’ and press the ‘Enter’ key to confirm.

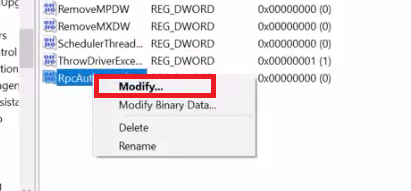
- Right click the newly created DWORD value and choose ‘Modify’ from the options.

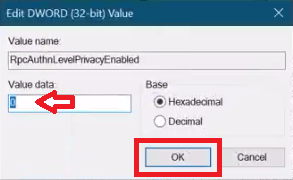
- In the Edit window, make sure the Value data is set to ‘0’ and click on the ‘OK’ button. Finally, close the Registry Editor.

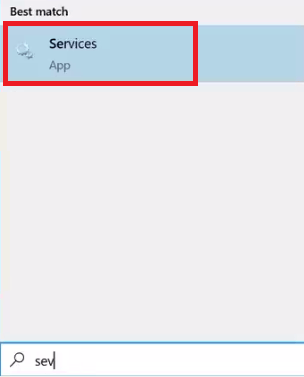
- Type ‘services’ in the taskbar search box and click on ‘Services’ in the search results.

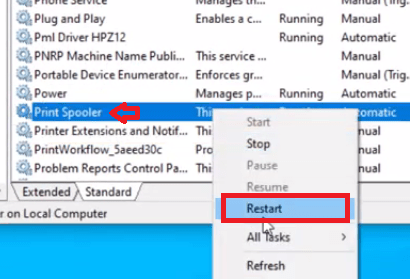
- In the list of Services, find and right click ‘Print Spooler’ service and choose ‘Restart’ from the menu.

- Wait for the Print Spooler service to restart. Finally, close the Services window.

Now, after restarting this computer move to the next steps given below.
3) Steps for the Client Computer
These steps are to be applied on the computer where you want to connect with the printer and are experiencing the ‘Windows cannot connect to the printer. Error 0x0000011B’ problem:
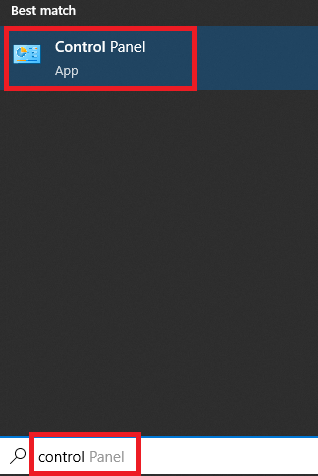
- Type ‘control’ in the taskbar search box and select ‘Control Panel’ from the search results.

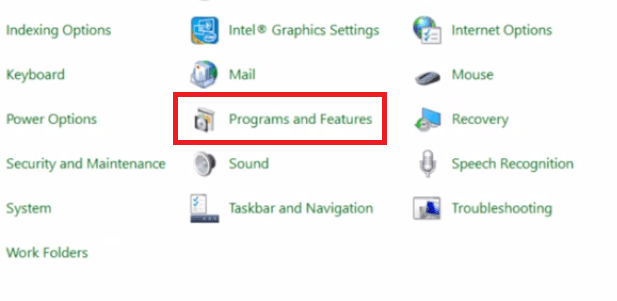
- In Control Panel window, click on the ‘Programs and Features’ option.

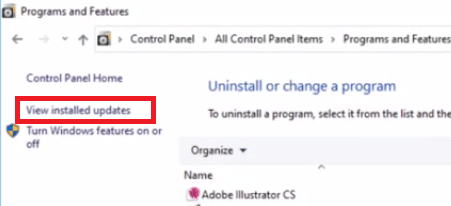
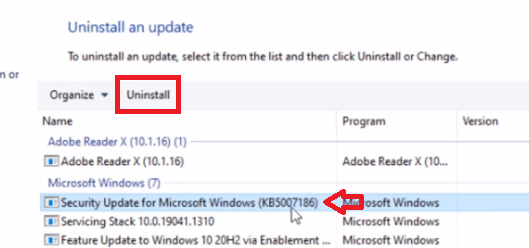
- In Programs and Features page, click on the ‘View installed updates’ link.

- In the list of installed Windows Updates, choose the Windows update which was recently installed and click on the ‘Uninstall’ button.

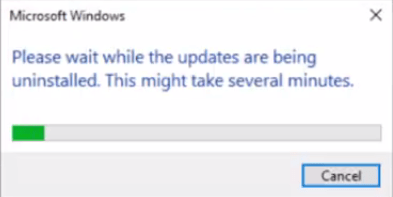
- Click on the ‘Yes’ button to allow the uninstallation of the chosen update.

- Wait for the Windows Update to uninstall.

- Click on the ‘Restart Now’ button to apply the changes.

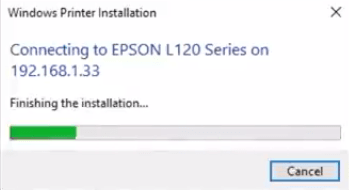
- After the computer restarts successfully, go to the Network page and double click on the printer link to connect with the printer.
- Wait for the printer installation to complete on the computer.

- Now, you can see the print queue window.


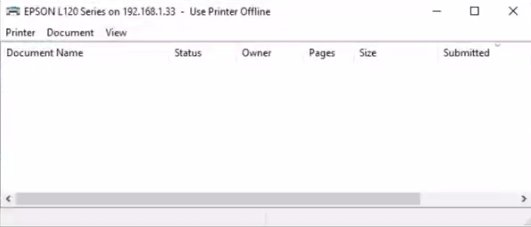
That’s it, you have fixed the “Windows cannot connect to the printer. Error: Operation failed with error 0x0000011B in network”.